QoS (Quality of Service) is an advanced feature which helps you set priority for specific applications and devices, so that they can perform better with lower latency.
Different Deco models have different support for this feature.
Devices supported both Application QoS and Device QoS:
Deco M5, Deco P7, Deco M9 Plus, Deco X20, Deco X60, Deco W3600
Devices supported Devices QoS only:
Deco M4, Deco E4, Deco W2400, Deco P9, Deco S4, Deco AC1200
Here we take Deco M9 Plus and Deco M4 as examples to show you how to set up the QoS feature.
Part 1: Setup QoS feature on Deco M9 Plus.
To set up application QoS
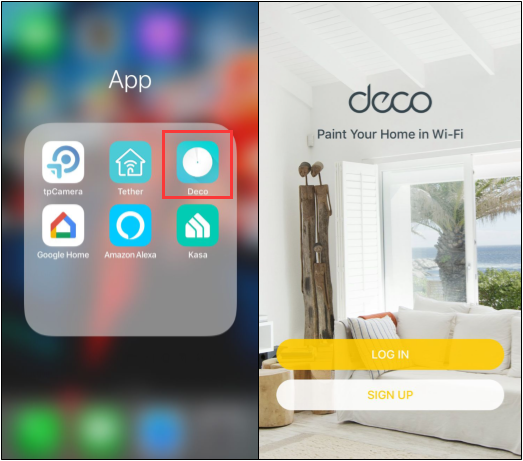
1. Launch the Deco App. Log in with your TP-Link ID or tap “Sign Up” to set up a TP-Link ID.
Note: If you are already logged in, this screen will be skipped.
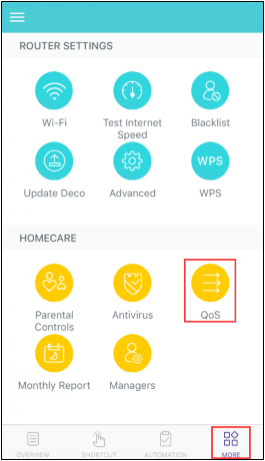
2. Tap “More”, then click on “QoS”.
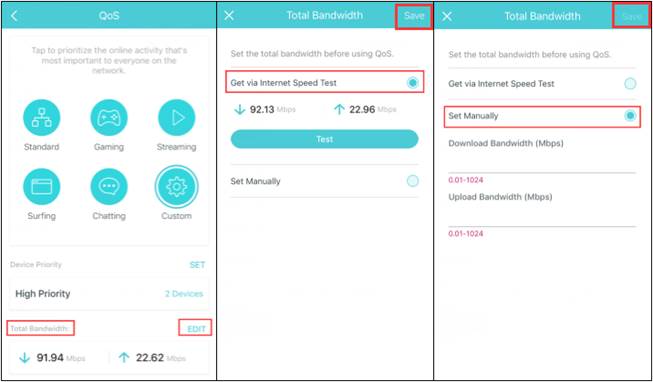
3. Click on “EDIT”, then you can set a total bandwidth for the QoS feature.
You can select “Get via Internet Speed Test”, or set the bandwidth manually according to the bandwidth provided by your ISP. Then click on “Save”.
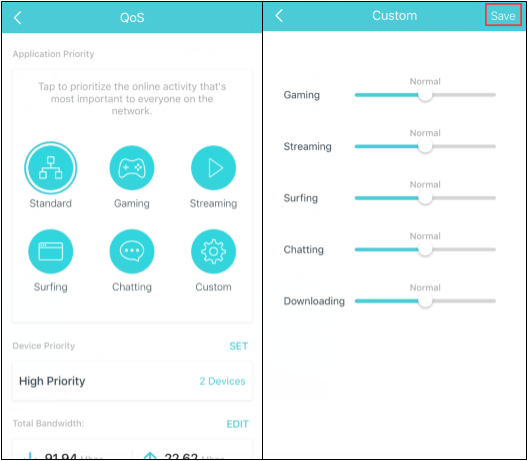
4. Select a preset application to apply the QoS feature. If you want to customize your QoS settings, please select “Custom” and drag the sliders to your desired setting. Once you’re done, tap “Save”.
To set up device QoS
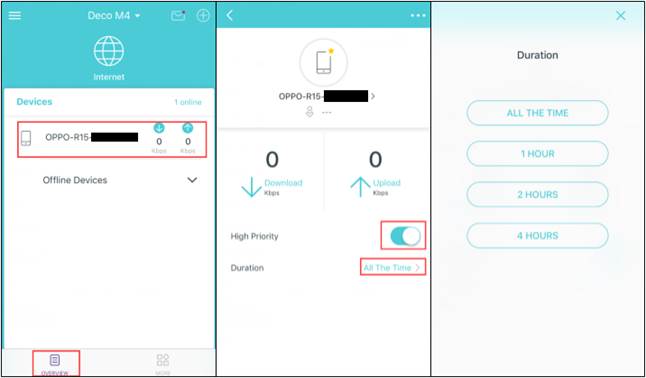
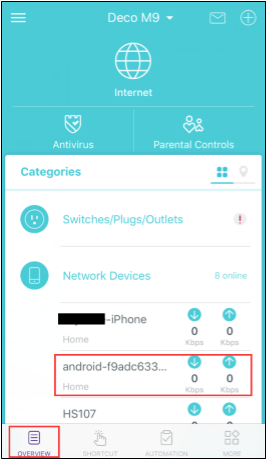
1. On the dashboard page, click on the network device that you want to set priority. This is where you are going to want to select your IP Phone in your network to configure it for the highest priority.
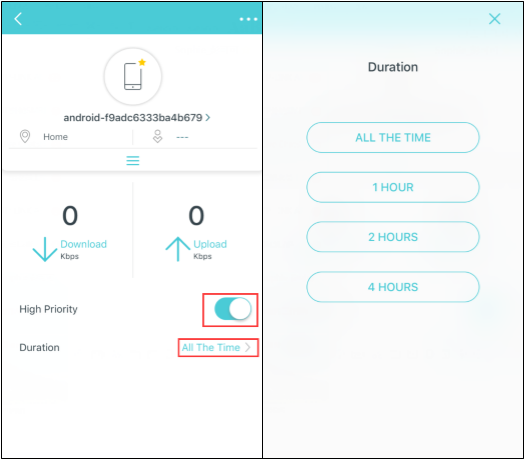
2. Enable “High Priority”, and tap “Duration” to set the time for how long the device will enjoy the priority.
Part 2. Setup QoS feature on Deco M4.
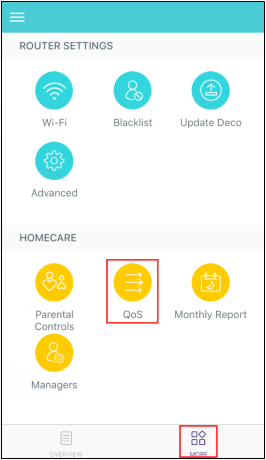
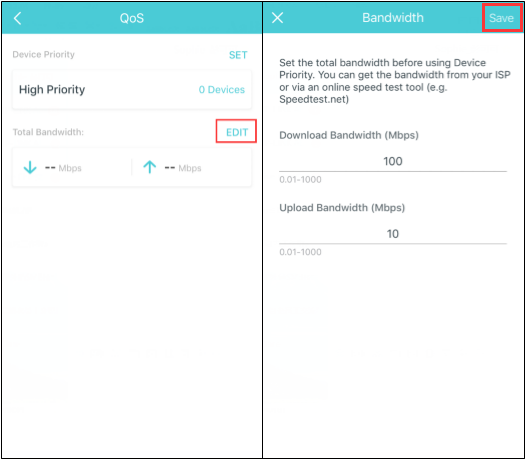
1. Click on “More”, then tap “QoS”.
2. Click on “EDIT”, then setup the bandwidth for the QoS feature according to the bandwidth provided by your ISP or the speed test result via an online speed test tool. Then click on “Save”.
3. On the dashboard page, click on the network device that you want to set priority. Enable “High Priority”, tap “Duration” to set the time for how long the device will enjoy the priority.
