This guide will walk you through how to configure a SonicWALL as recommended for your VoIP service.
Consistent NAT
- Click on VoIP
- Click on Settings
- Set Enable consistent NAT to disabled
- Every other checkbox on this page should be unchecked as well.
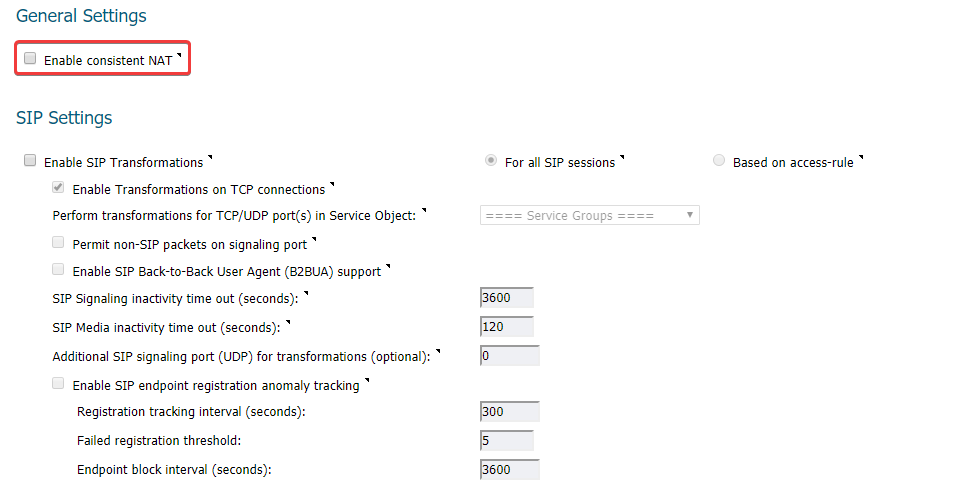
- Click Accept
Advanced Firewall Settings
- Click on Firewall Settings
- Click on Advanced
- Set Enable Stealth Mode and Randomize IP ID to disabled.
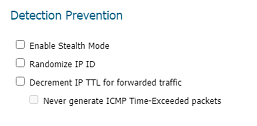
- Click Accept
Create Custom VoIP Services
- Under Network > Services click Add…
- Fill the popup as follows:
- Name: VoIP RTP
- Protocol: UDP
- Port Range: 3000 – 65000
- Sub Type: None
- Click Add
- Click on Service Groups > Add Group…
- Name: VOIP Services
- Add the following services to the right box
- SIP
- VoIP RTP
- Click Add
Create LAN > WAN Rule for Services
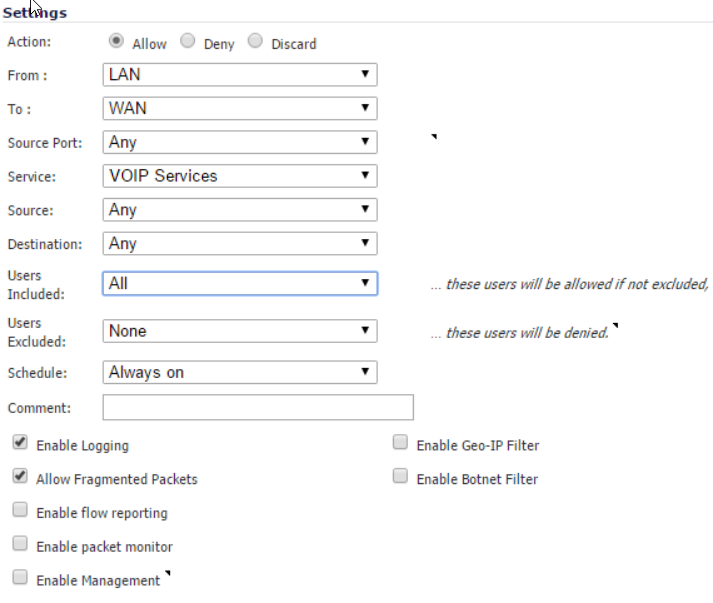
- Navigate to Firewall > Access Rules
- Click on Matrix
- Click on the arrow under LAN > WAN
- Click on Add…
- Source Port: Any
- Service: VOIP Services
- Source: Any
- Destination: Any
- Users Included: All
- Users Excluded: None
- Schedule: Always On
- Comment: QoS for VoIP Phones
- Enable Logging: True
- Allow Fragmented Packets: True
- Click on the Advanced tab
- UDP Connection Inactivity Timeout (seconds): 90
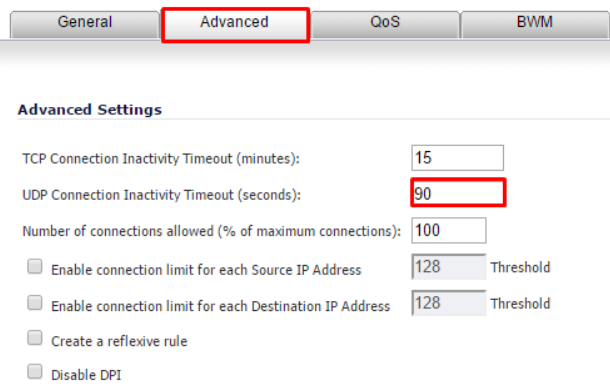
- UDP Connection Inactivity Timeout (seconds): 90
Create Address Group for Voice Services
- Click Firewall > Address Objects > Add
- Fill out the following:
- Name: Name of the Assignment
- Zone Assignment: WAN
- Type: Host
- IP Address: IP of the Server
NOTE: You are going to need to contact support to get the IP addresses of the SIP Services your account is provisioned too. Also these may change with out warning depending on network and system loads.
- Add each IP Address for Voice Services as an Address Object
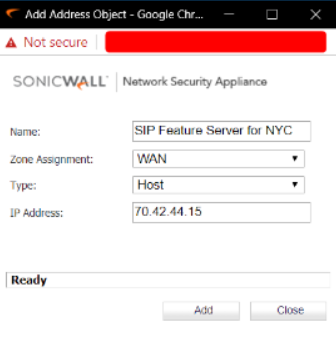
- Create an Address Groupand add the address objects that were created
- Name: Voice Services
Excluding Voice Services IPs under Security Services (if applicable)
- Click Security Services
- Check each Service and see if it is enabled
- If so, you need to enable the Exclusion List on each service and set it to Voice Services
- Example: Content Filter

- Once you exclude it, click Accept
