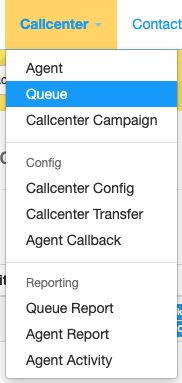
Setting up Queues is fairly simple. To Manage a Queue Click on CallCenter and then select Queue from the Sub-Menu:

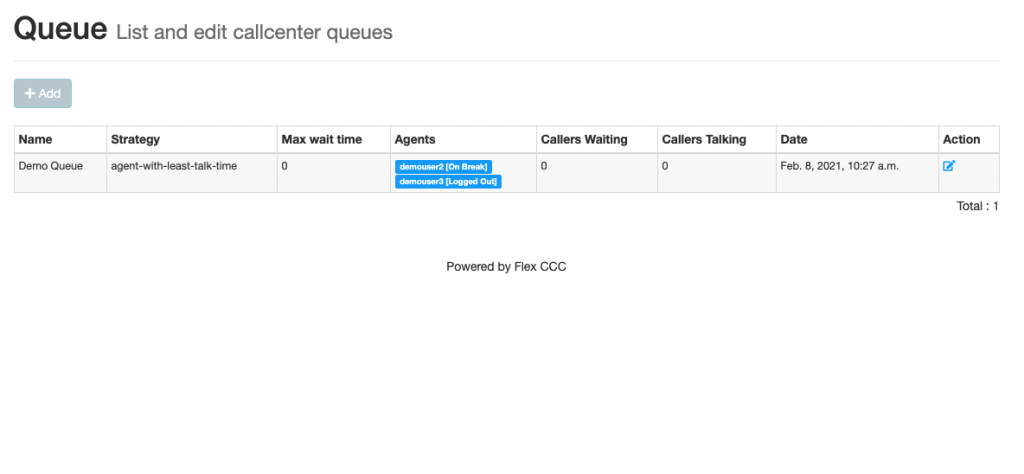
Queue Management Screen

This is the Call Queue Management Screen. From this screen you are able to not only see information about your different call queues, but you can also Add, Update, and Delete your existing call Queues call from one place.
On this screen is some important information to help you better manage your call queue lifecycle:
- Name – This is the Name you have given to your Call Queue
- Strategy – This is the call Distribution Strategy the system will use to route calls to your active agents.
- Agents – This is a list of all of the agents assigned to this Call Queue as well as their current state.
- Callers Waiting – This will display the number of callers currently waiting in the queue to speak with an Agent.
- Callers Talking – This will display the number of callers currently speaking with an agent.
- Date – The Date the Queue was last edited.
Adding a Queue
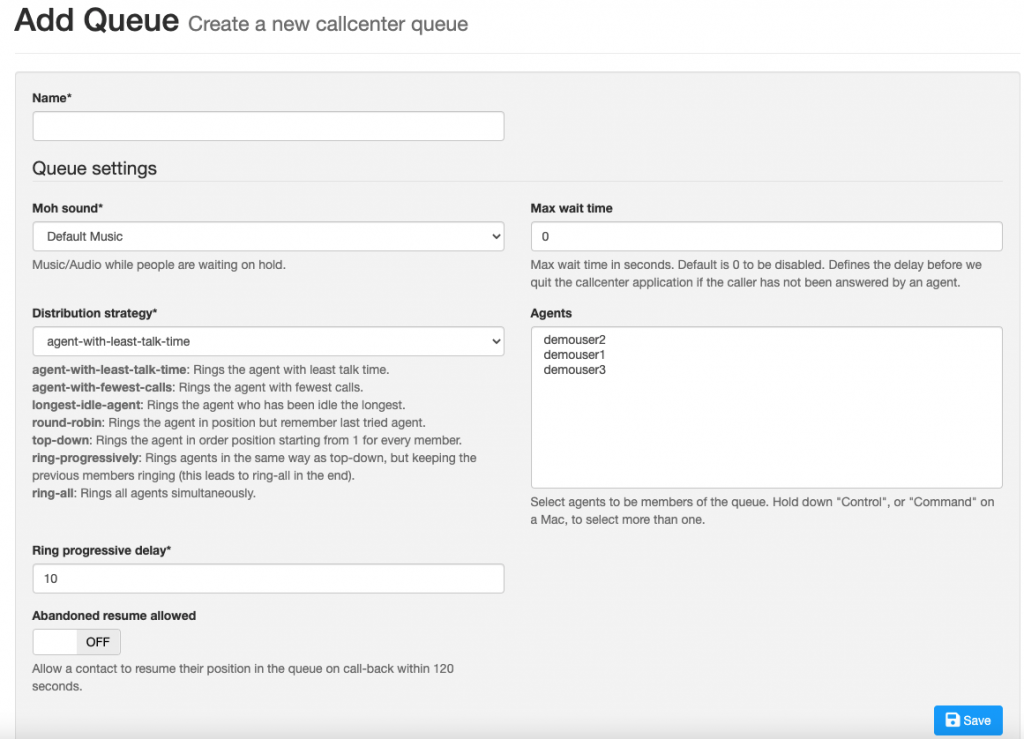
To add a Queue, click on the Add Button on the Queue Management Screen. When you do the Add Queue Screen will be displayed:

There are seven fields in the Add Queue Screen. Each is important so you will want to understand what they are for:
- Name – This the Name you would like to assign to the queue
- MOD Sound – This is the Music on hold that will be used for this queue. You are able to upload different sound files from the “Modules” menu at the top of your screen.
- Distribution Strategy – This is the routing strategy the platform will use to route calls to your active agents. There are 7 routing strategies to choose from:
- agent-with-least-talk-time – The system will use the agent’s overall talk time and the route calls to the agent with the lowest amount of talk time first. The agent’s talk times are sorted by the system in ascending order.
- agent-with-fewest-calls – This one is fairly easy to understand. The system will look at the agent’s total call volume then select the agent with the fewest number of calls for the day. Agent call volumes are sorted in ascending order from that point.
- longest-idle-agent – This method will route calls to the agent that has been idle the longest first. This value is tracked based on the amount of time since the agent took a call and can be viewed from the Agent Management Screen. This value is sorted ascending.
- Round Robin – The routing robin method is used to ring one agent at a time. The system will remember which agent was called last. This is sometimes referred to as Round Robin with Memory.
- Top Down – The agents are sorted by their usernames and then called in order top down.
- Ringing Progressively – Among Agents this is one of the most hated methods, but useful in some cases say for an emergency support queue. Agents will be ring top-down, but will continuously be rung until someone takes the call. The result is that all of the agents will be ringing at the end if no one takes the call before the list of agents is exhausted.
- Ring All – The name says it all. This method will ring all of the agents at the same time and will continue to ring them until one of the agents takes the call.
- Ring Progressive Delay – This is the delay in seconds used to determine how long of a time the system will wait before contacting the next agent when using the “Ring Progressively” method. Unless you are using this method, this value is ignored by the system.
- Abandoned Resume Allow – This feature allows a caller to maintain their position on the queue in the event their call should drop before speaking with an agent. If the caller calls back into the queue within 120 seconds (2 minutes) of their call dropping, they will maintain their queue position automatically.
- Max Wait Time – This is the maximum wait time in seconds a caller/contact can wait in a queue. A value of 0 Disables this feature.
- Agents – This is a list of the agents you would like to assign to this queue. You are able to use the same agent in Multiple Queues. To select more than one agent, use the Control or Command key during the selection process.
After you have completed the configuration. Click on Save.
Editing and Updating Queues
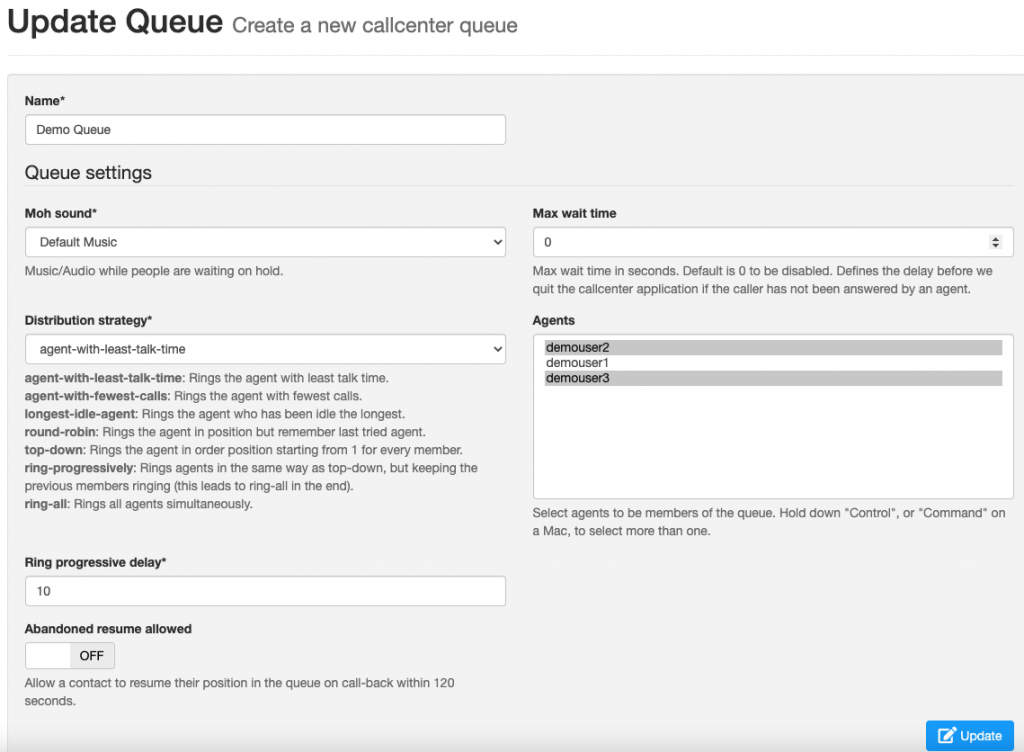
To edit a Queue, click on the edit icon in the Actions Column to the right of the Queue Management Screen.

This will bring you to the Queue Update Screen, which has the same information as the Queue Add Screen.

After you have completed updating your Queue Settings, click on the Update button to save your changes.
