Provisioning a Polycom device can be accomplished in four easy steps. By the time this is complete, you should have a working device. This process requires that you have already added the device to your account within Flex UC via the SmartPBX App.
Step 1: Reset Device Settings
Please also make sure that you have reset your device to factory settings.
To do so:
Click on the Menu
- Select 3: Settings
- Select 2: Advanced (Password 456)
- Select 1: Admin Settings
- Select 5: Reset to Defaults
- Select 5: Reset To Factory Settings
For more information on completing the factory default process on a Polycom IP Phone, please see this article: https://help.oneuc.com/knowledge-base/how-to-reset-to-factory-polycom-devices/
Step 2: Obtain Phone’s IP Address
In order to provision a Polycom phone, you will first need to get its IP address in order to access the phone’s web interface. To do so, find the menu on the phone and then press “Menu > Status > Platform > Phone.” You should see a line as you scroll down, for example: “IP: 10.10.9.88”. Please make sure that your device jack is plugged in. If it is not plugged in, it will read IP: 0.0.0.0.
Step 3: Enter the IP Address in a New Tab in Your Browser
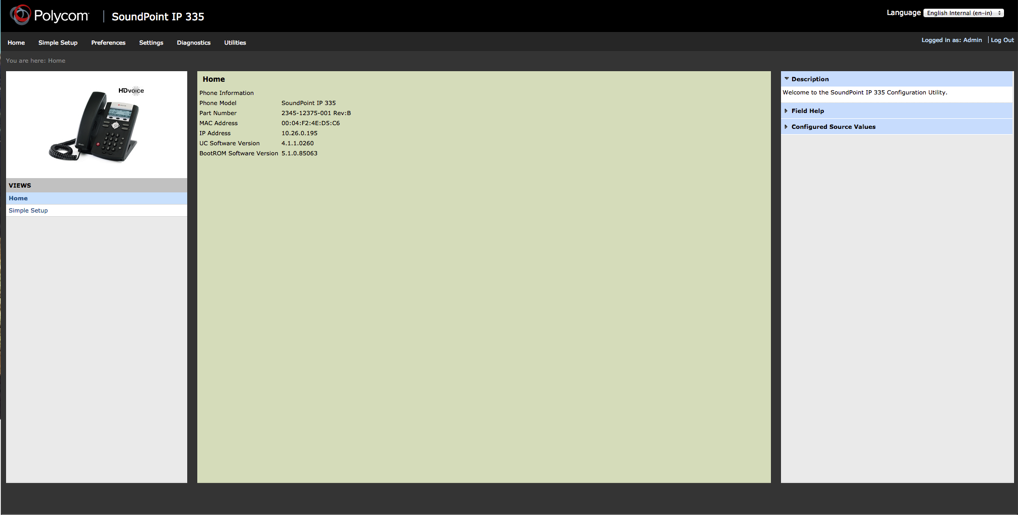
In a new browser tab on your computer, enter this IP address that you see on your device (the default password is “456”).
You should see something like this:

Step 4: Autoprovision Device
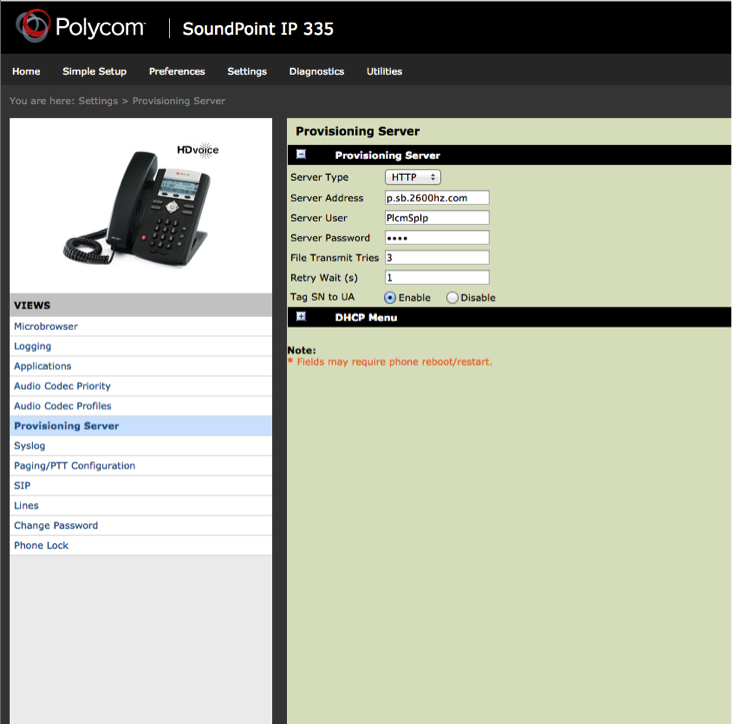
From there, click on to “Settings” in the top tab and then select “Provisioning Server.”
In “Server Type” dropdown, choose “HTTP”.
In “Server Address,” input the provisioning URL pf.avpnet.us
- Do not put the http:// in front of it).
- Please do not alter the “Server User,” “Server Password,” “File Transmit Tries,” or “Retry Wait.”
“Tag SN to UA” MUST be set to “Enable”
Save changes. The phone should reboot, if not then try manually rebooting the phone.
Your page should look like:

