About Callflows
Callflows is an application that exposes our APIs in a GUI format, enabling very complex and custom call routing plans when needed. It is used in addition to the SmartPBX app to supplement the basic call routing configurations available there. See the user stories below as examples:
User Stories
- An account has multiple geographic locations and needs to create
- Unique office hours and holiday schedules
- Different language defaults
- Different answering notices depending on incoming call source and time of day
- A series of sub-menus and selections (press 1 for support, then 2 for apps and 3 for service issues)
- An account wants to set up multiple call center queues (for support and sales for example)
- An account wants to customize incoming call sequences based on unique variables, such as phone number, holidays, etc.
- An account wants to route incoming fax calls based on time of day or prepend number
Before You Start
Before you start to implement custom callflows, confirm your settings in SmartPBX.
This will ensure you have the newest fields and settings configured for your account.
In addition the Callflows application accesses and writes settings data that can affect many other applications. It is important the manager working with Callflows has a strong knowledge of how these applications work together and what ripple effects can occur when working with and changing these settings.
Accessing Callflows
Once your account is created in SmartPBX, go to the applications menu and select Callflows.

If it’s not displayed,
- Try searching for it in the Search Apps field to your left.
- Select the App Exchange button, find Callflows there, and select it. Then use the toggle to enable it.
- If you still don’t see it, contact your system administrator.
Your Callflows Dashboard
The “home page” to the Callflows dashboard will look like this. The large Callflows selection brings you to the home screen where you can build a callflow. The smaller selections help define attributes for each “flow.” You can access them here, or when you select one of these actions, by picking Edit / Advanced options.

Building a Callflow
When you click on Callflows you will see a brief tutorial for creating a new process and to the left a list of existing callflows assigned to your account and the option to add a new one.
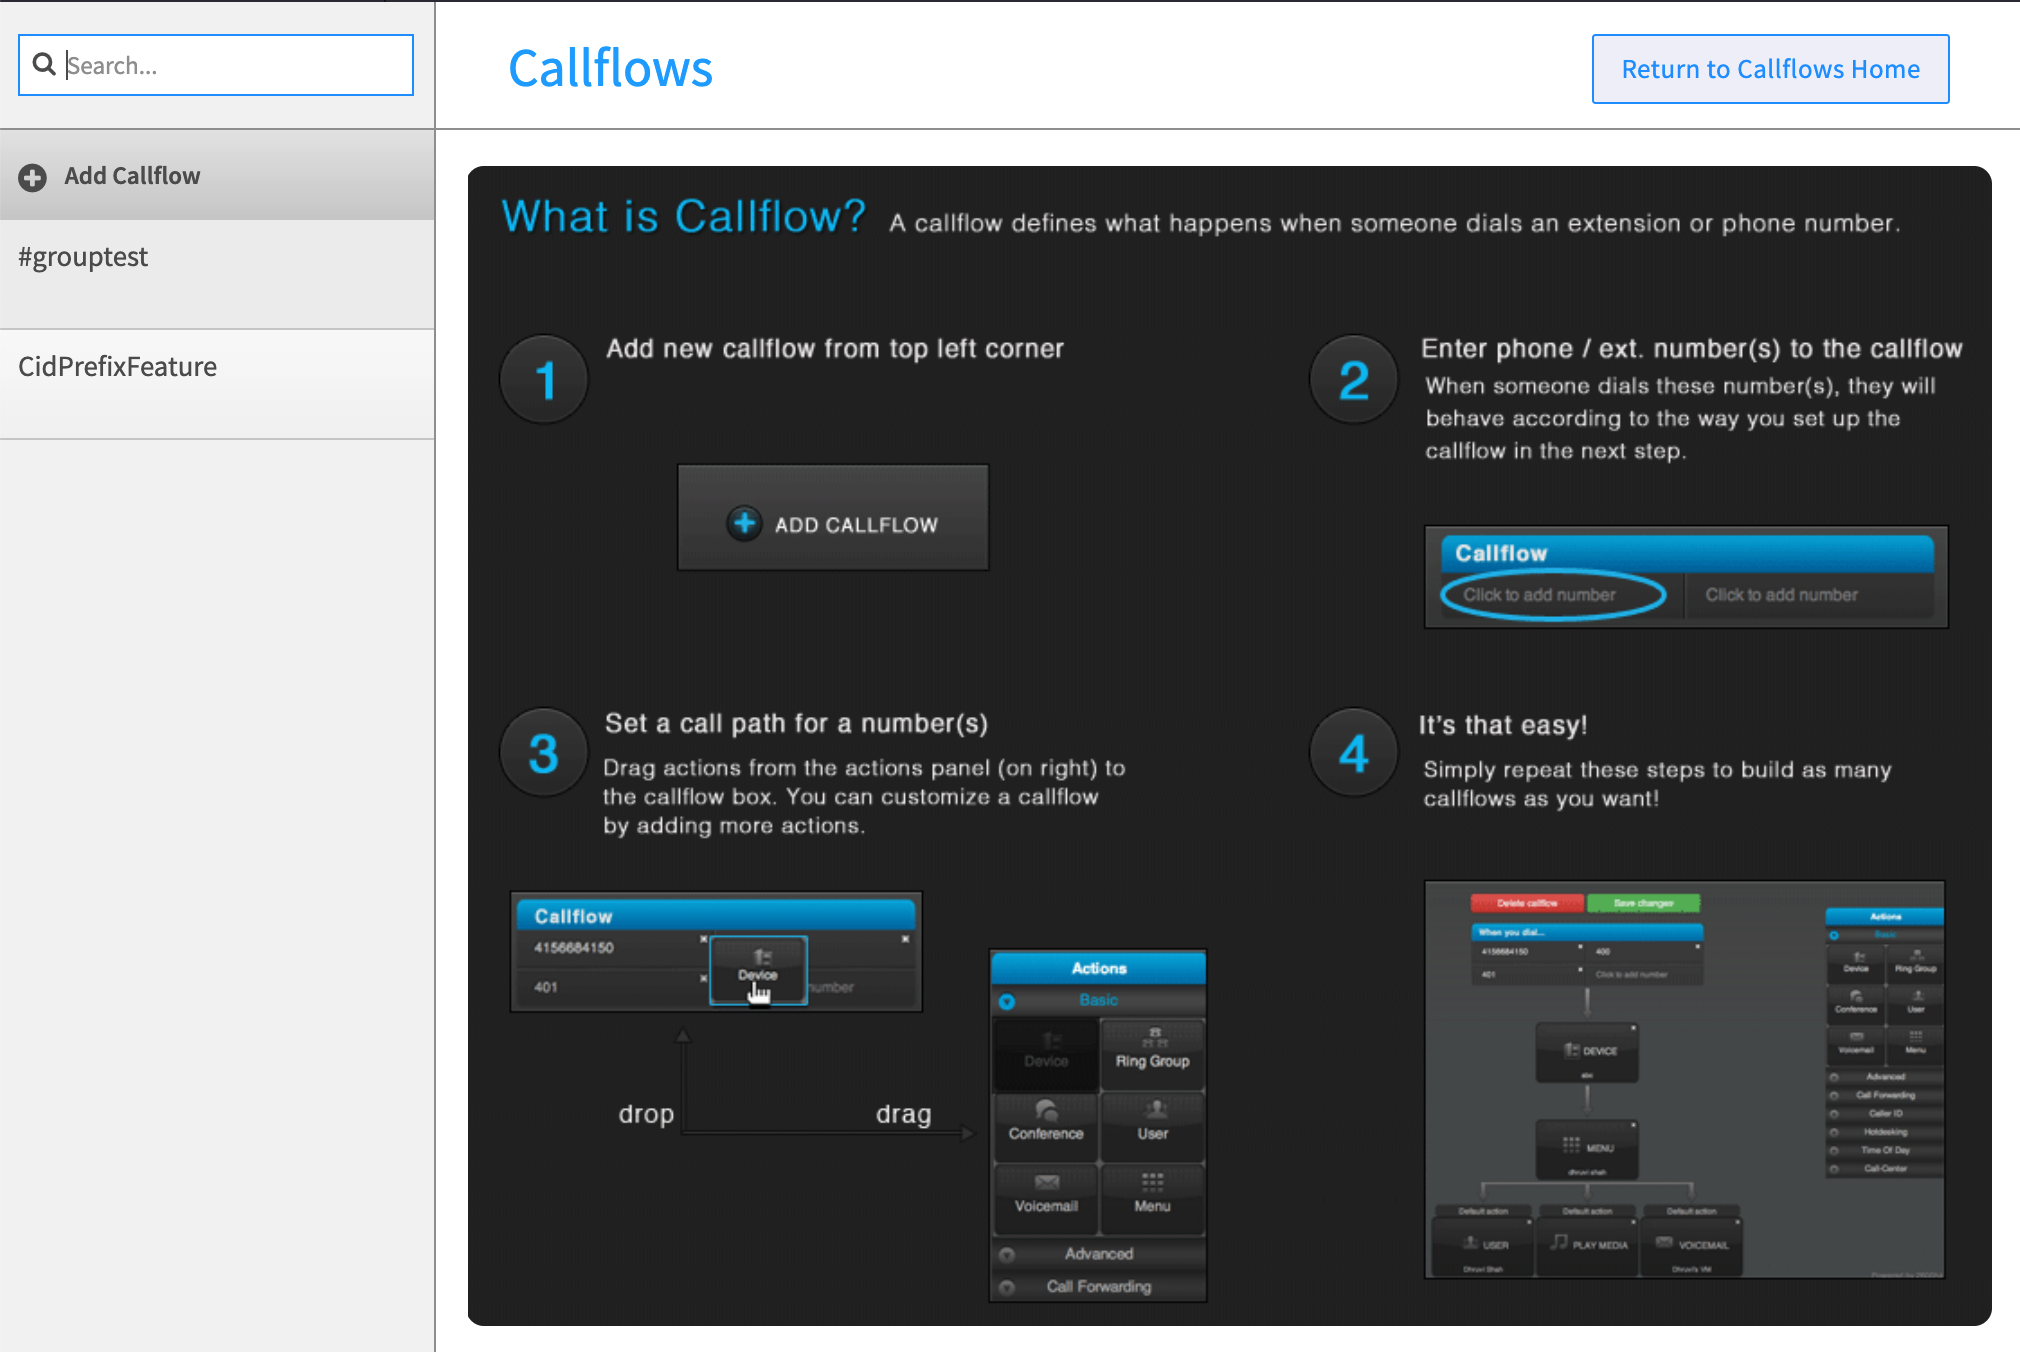
It outlines the following steps:
- Add a Callflow (create new)
- Enter phone number / extension(s) tied to this process
- Drag your action into the diagram
- Save your changes
A more detailed look at these steps is outlined below:
Add a Callflow
- Select the Add callflow button in the left menu bar. You will see a “blank screen” waiting to be filled, and the Actions menu to the right.
- Click the black bar to assign a number to your callflow.
NOTE: if you want to edit an existing callflow, select the edit pencil in the blue bar, upper right.
- Select either
- a phone number in your account (you can buy one also)
- an existing extension shown in the dropdown
- enter a new extension
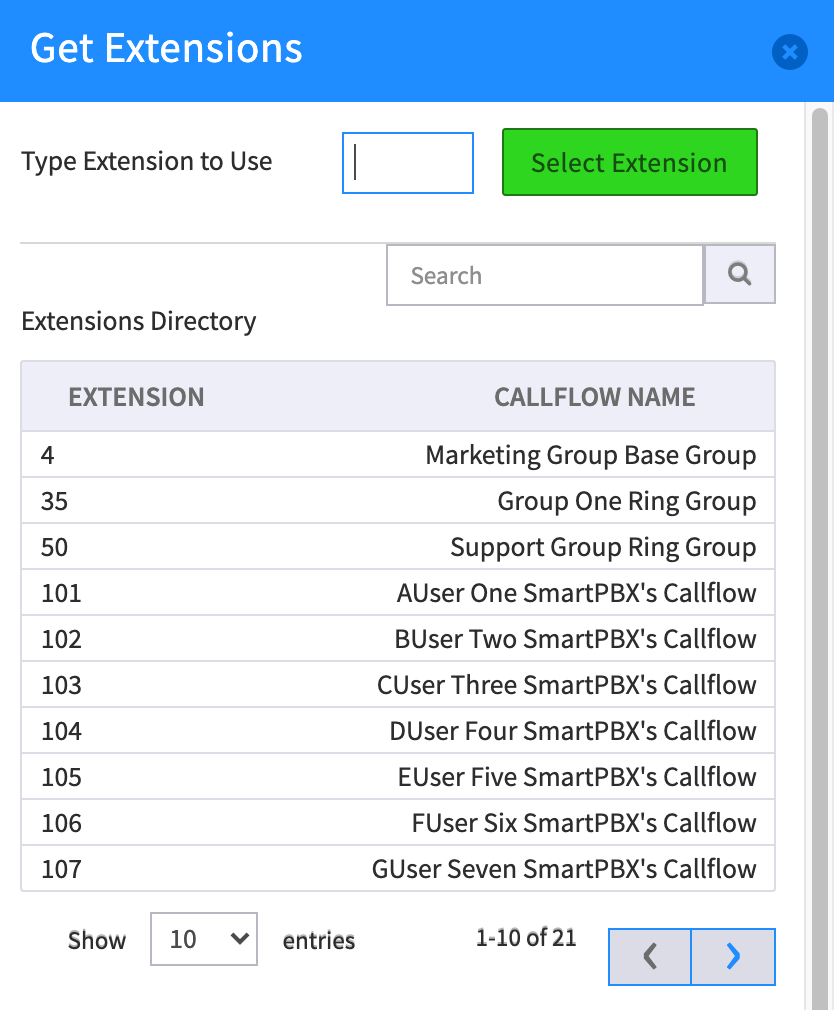
Your selection(s) will display in the black title bar and you are ready to add your actions!
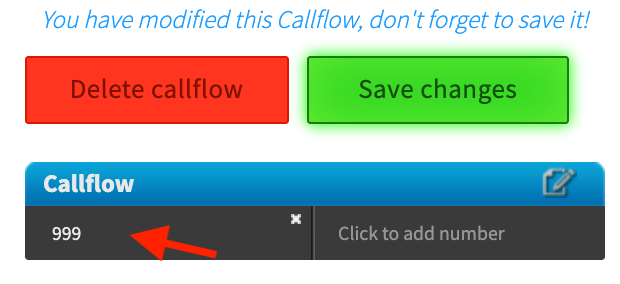
NOTES:
- Your callflow cannot be saved until you add at least one action.
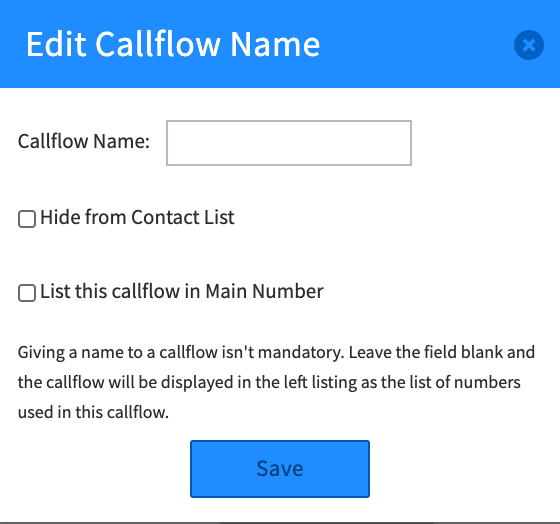
- When first saved, your callflow will display its name as the first extension number you have entered. If you want to change the name, select the edit icon at the top right of the blue callflow bar.
Enter a unique name, and decide if you want it displayed as a “contact” and in SmartPBX’s main number list options.
Next, review the Actions shown on the right menu bar.
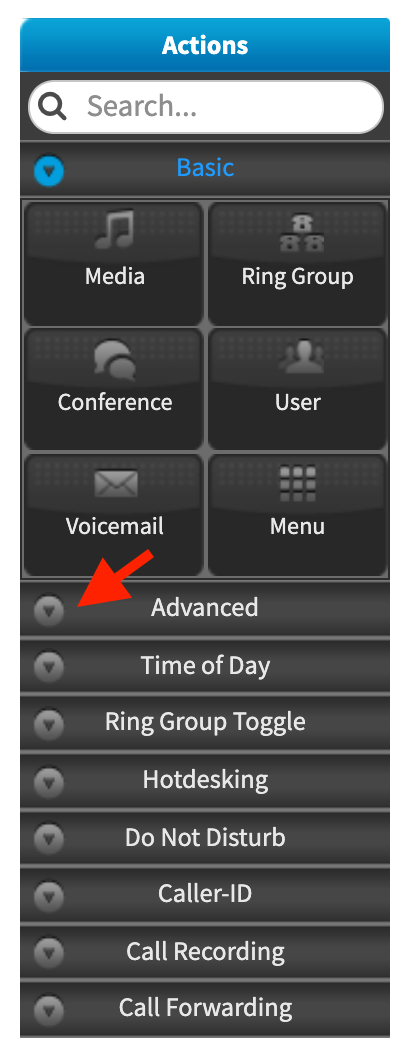
NOTES:
- The Basic Menu, with the most popular actions is displayed and open by default. To view additional actions available click on the drop down arrow of the eight additional topics.
- For a complete listing of the Actions available in this menu and the parameters they request, see below.
Drag the actions to your “palette” in the order you want the callflow to take. “Drop” it onto the last action you have identified, and it will connect below. Depending on the action you choose, you will need to enter additional information to a dialog box that will pop up.
- Some actions trigger dual dialog boxes to display, for example the “Menu” action allows you to enter several menu items.
- Make sure to save each dialog box entry! See notes above on how to name your callflow.
- To remove a block, click on the x at the top right.
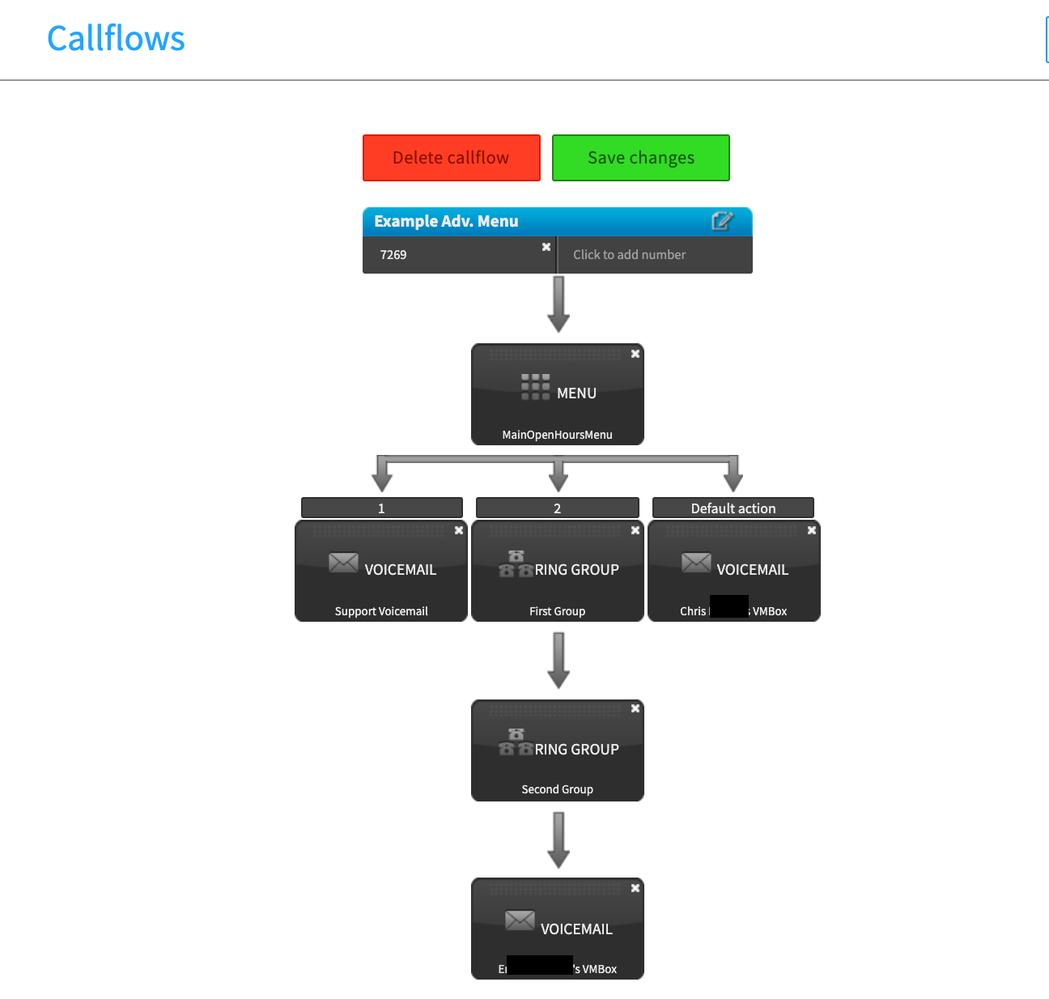
Sample Callflow
Below is a sample that uses basic actions only. It provides a submenu set of options to go to a ring group, to a generic Support Voicemail box, or to a “home” voicemail box.
Callflows Actions Available
An overview of all the possible callflow actions that are available to use is below.
NOTES:
- Many of the Settings and Advanced settings values can be defined in SmartPBX; those values will display here. If you change the settings in callflows as part of your configuration the changes will also appear in SmartPBX. Make sure your changes will not affect what has already been defined there (such as Time of Day and Holidays).
Frequently Asked Questions
What is the difference between these two applications?
They are the same. Advanced Callflows was introduced as a newer version of Callflows. The code has since been merged, and the name simplified. Mentions of Advanced Callflows are only due to legacy habits.
Can one callflow call another callflow?
Yes! One of the action buttons in the Basic menu is “Callflow” which lets you define an existing callflow to connect to.
Is there a limit to the number of steps I can add to a callflow?
No, however the more steps there are the more time will lapse as the steps progress. We recommend shorter Callflow configurations. This way each callflow can be reused as sub-flows for different instances.
You will want to test the callflow once you’ve created it to make sure it isn’t too slow.
I tried to create a callflow using our main number, and it says the number is already in use. How can you make a callflow for your main phone line??
(not using the SmartPBX, but by using the Advanced Callflow app).
Advanced Callflows provides added flexibility in setting where your calls go based on the incoming call number or extension. If your number is showing “Already in Use”, try the following:
- Look to see if SmartPBX automatically created a callflow from your main number when it was installed.
- Look for the “Used_by” attribute next to the number for a clue to its assignments
Most people will create a new callflow with an extension to direct calls. If you do this,
- Make sure the checkbox on the menu screen is checked for “Allow caller to dial extensions.”
- When you create the callflow, click on the bar at the top of the callflow name, with the little edit button
- Check the box that says “Make this callflow available to the Main Number”
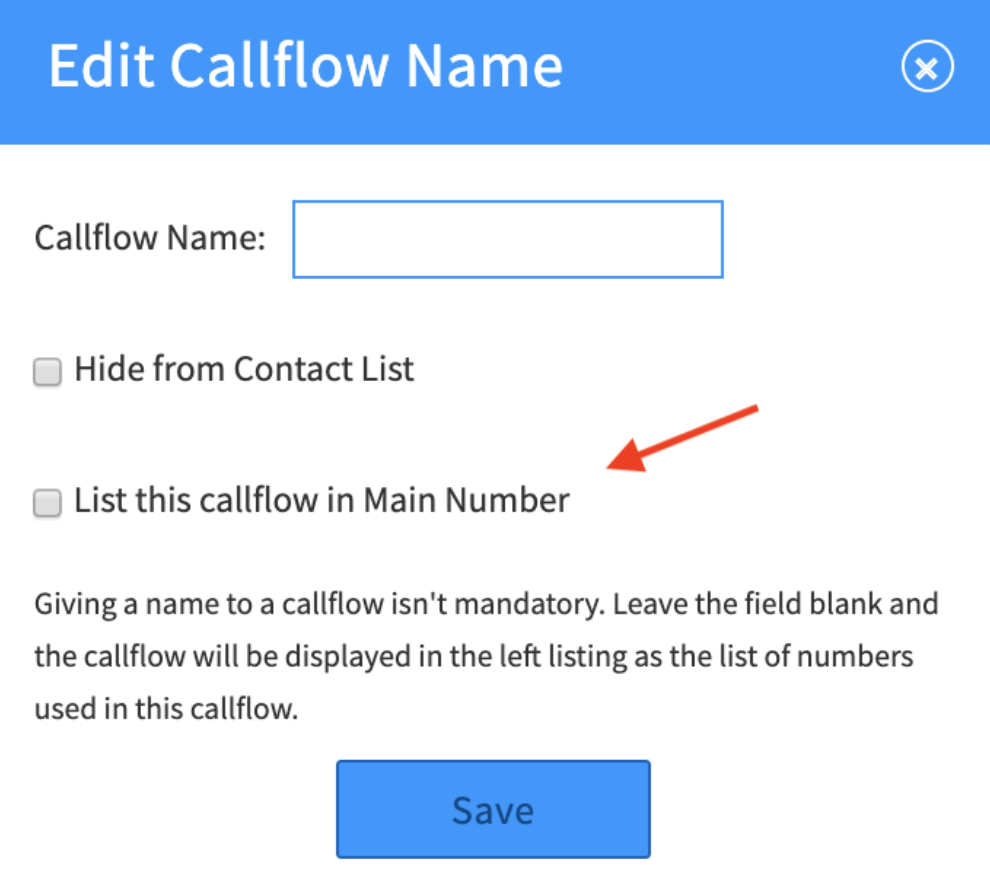
- Return to SmartPBX and navigate tot he Main Number Incoming Call Routing option. You should see the new callflow option.
I created an IVR call flow in SmartPBX and now want to edit that using some of the more advanced Callflows features. Where can I access the SmartPBX callflow?
”Callflows” developed in SmartPBX are currently not accessible within callflows. If you want to create a more detailed callflow than SmartPBX offers, you will need to create it from scratch in the Callflows app and point your SmartPBX (holiday hours greetings for example) to the callflow you create.
Is there any way to manually override a Main Number callflow if, for example we want to hold an impromptu all-hands meeting for a quick half hour during the day?
There are several suggestions for achieving this discussed in our community forum here.
How can I set up a system where one option in my menu is to “repeat the menu options?”
Earlier versions of Flex UC allowed you to point to the same callflow as an option. This however caused unfriendly infinite loops and has been disabled. The current best option is to create another callflow that points back to the original callflow (call it a loopback callflow) then reference the loopback in the original.
How can I create a callflow using extension 0?
The SmartPBX automatically creates the Main Callflow with extension 0; it is not configurable for other callflows.
When I have a horizontal list of callflow options, what order does the callflow take?
The callflow will process the options from Left to Right. If for example you have a Time of Day process and list
Morning hours | Evening hours | Holidays
the flow will not take advance to Holidays if the other flow options apply. We recommend putting your Holiday option first. Note also in this example, these values can be set in SmartPBX, and the precedence for holidays is already set.
What happens if a caller doesn’t select an option in the menu system?
By default the menu system is set to allow 3 “misdials” (or no entry) and will replay the menu after 10 seconds. To change these settings, go to the menu action, and select Advanced Options. You can manage the threshold for the amount of retries and the length of time between tries there.
What does “Require Key Press” mean in the Advanced User menu?
Requiring the key press is the mechanism that prevents the forwarded call from terminating in the forwarded number’s voicemail box. It is the same trigger or setting as “Leave voicemail on forwarded numbers.” where by turning this off you enable an option for voicemail at a separate station. So, disabled “require key press” = leave voicemail on forwarded numbers”.
