The Call-Center Config allows you to create an agent script and allows tag replacement to be used to include specific information about a contact.
There is integration with most web based CRM systems, where a link can be added along with the customer’s ID uploaded with the contact to automatically open the CRM at the contacts’s record.
The numbers that agents are allowed to transfer to with this call center config are selected here.
Setting up your Call Center Config
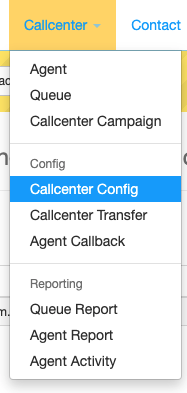
To access the Call Center Configs you will need to Select CallCenter From the Top Navigation, the select Call Center Config from the Sub-Menu:

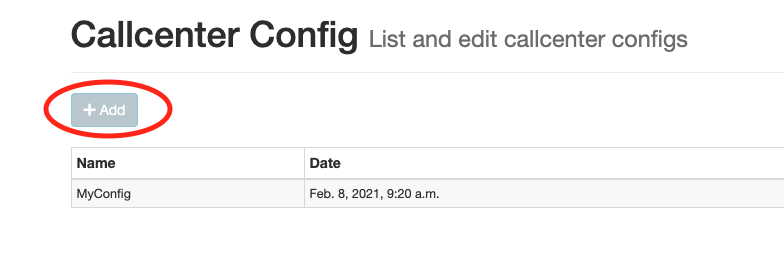
This will bring up the Call Center Config Management Screen.
Adding a new Call Center Config
To add a new Call Center Config, Click on the Add Button on the Call Center Config Management Screen:

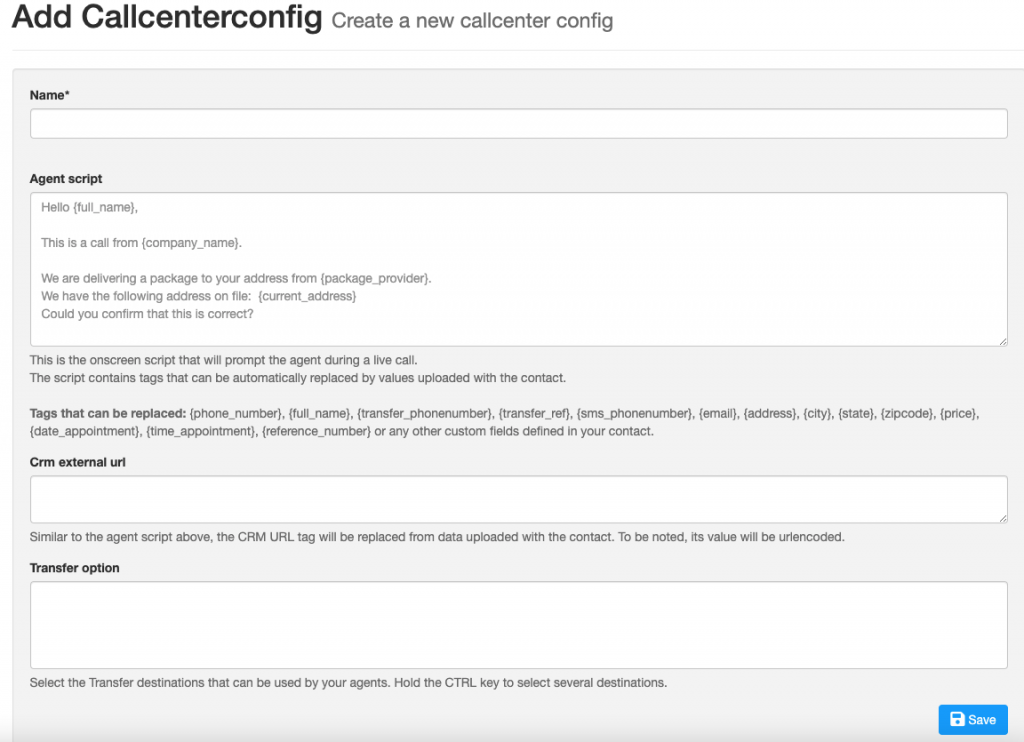
Next you can provide the details for your Call Center Config:

There are 4 Fields in the Call Center Configuration Screen:
- Name – What do you want to call this config.
- Agent Script – This is the script that will be displayed in the Agent Portal when an agent gets an inbound call. You can use the replacement Tags to customize the script with related information about the caller/contact.
- CRM External URL – If you are using an external CRM like Hubspot or our CRM Teampace.io you can use this field to configure the URL which is used to create a screen pop. Replacement tags can also be used to pass information about the caller/contact to your CRM. If you need assistance with this please contact support. (Service Fee for the setup of a CRM External URL may Apply)
- Transfer Options – Transfer options are presented in the agent portal and allows the agent to transfer the caller/contact. Transfer Options are configured in the Transfer Config Screen.
After you complete the Configuration simple hit the save button.
Updating a Call Center Config
Updating a Call Center Config is very simple. To do so click on the Edit Icon:

You will them be able to update the Call Center Config based on the details noted above.
