In this article we will go over the different functions within the agent portal.
Receiving Calls
When a call is received, the contact’s details are displayed on screen.
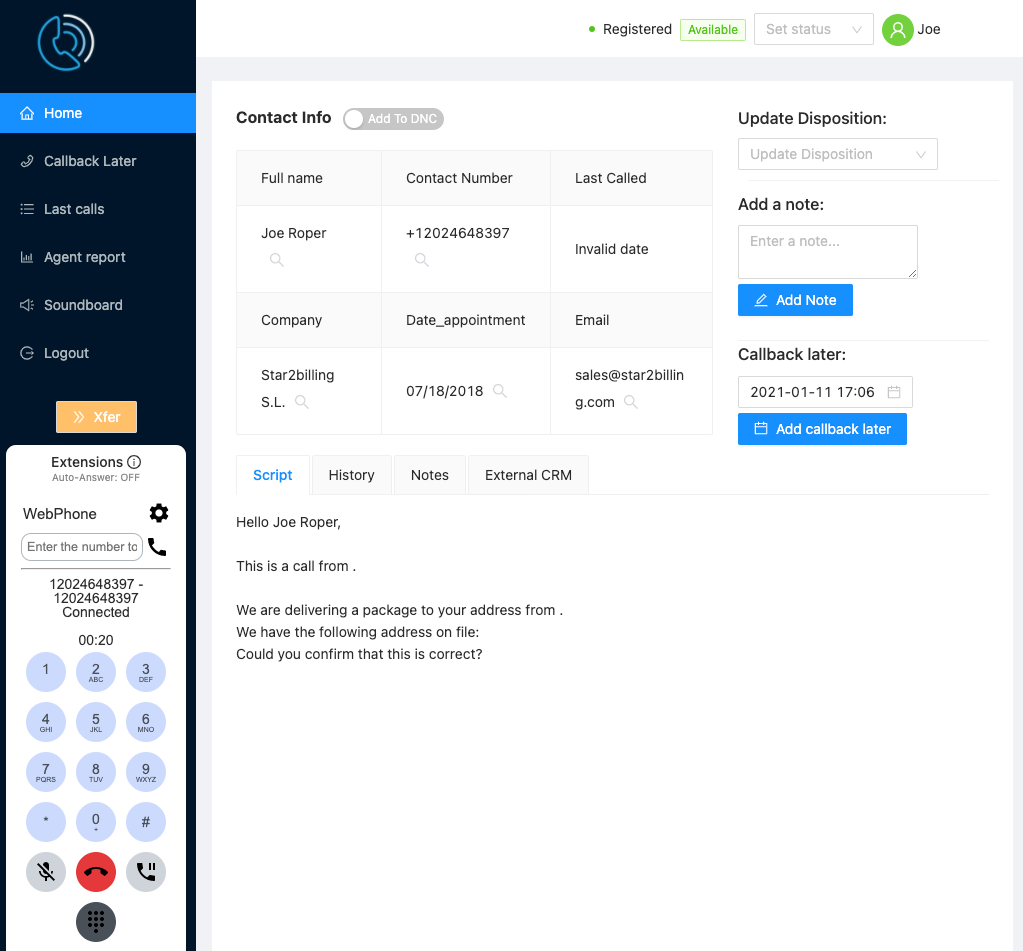
Next to each element is a magnifying glass which searches Google with that search term. From this screen the agent has a number of functions at their disposal:
- Update Disposition – The adminstrator can set Lead Dispositions and these can be selected and set with the dropdown
- Add A Note – Write notes that will be saved with the contact for future calls.
- Callback Later – Set a date and time to callback a contact. The callbacks to perform are listed in the left hand menu. Callbacks need to be triggered manually. By default the date is set to 24 hours hence, unless it’s Friday, then the callback will be set to Monday.
- Script – Script set by the adminstrator in the Call Center Config. (see admin guide)
- History – Timeline of notes added and dispositions changed.
- Notes – Content of notes previously added
- External CRM – Link to open an external web based CRM system at the appropriate record, configured by the adminstrator in the Callcenter Config.
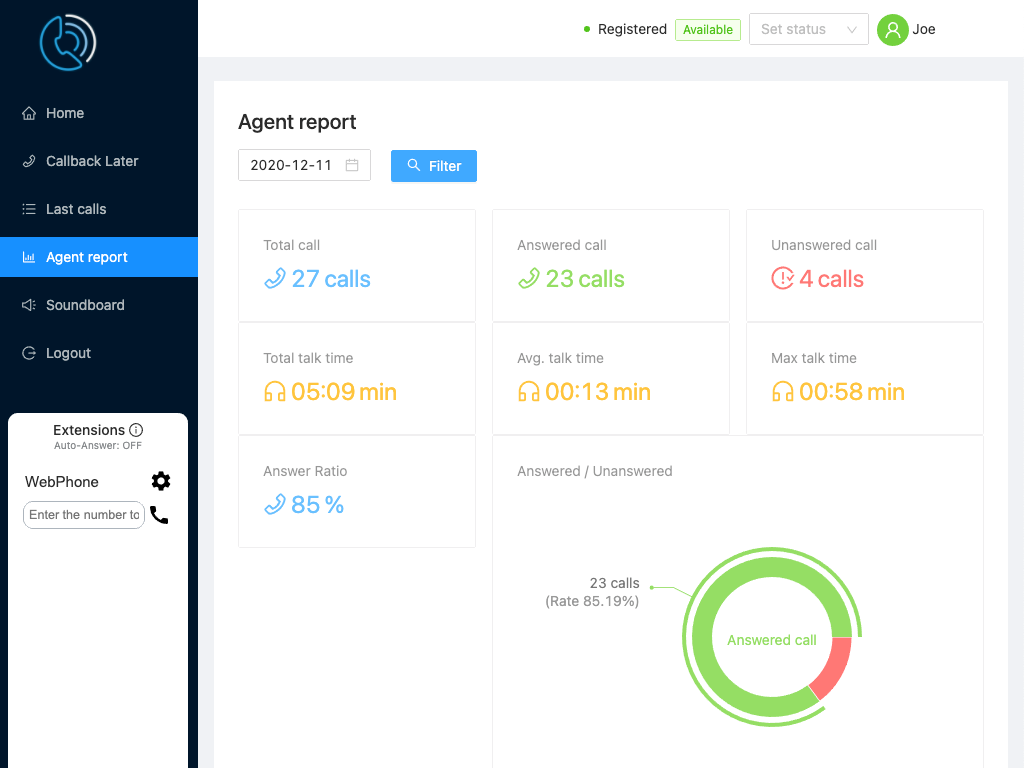
Agent’s also have access to a report of their activities for the day:
Soundboard
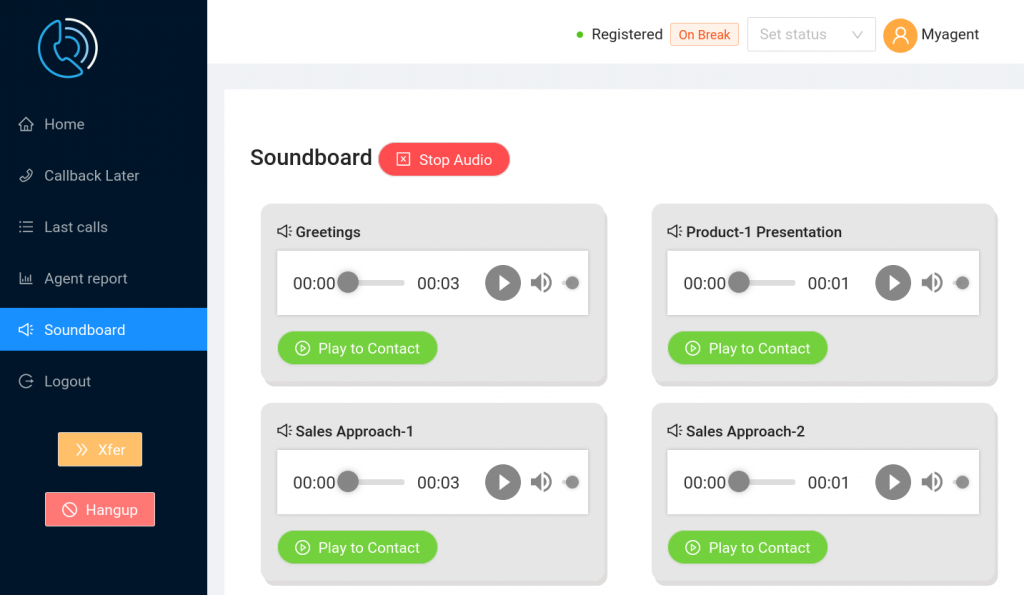
The Soundboard feature in the Agent Portal allows the agent to play pre-recorded audio messages to the caller with one click. Each audio file can be previewed by the agent.
Audio can be interrupted and the agent takes over at any time with the stop audio button. The administrator can configure what audio is available for each agent individually.
Xfer – Call Transfers
Transfer destinations are configured in advance by the adminstrator in the Callcenter Transfer and Callcenter Config screens under the Callcenter menu.
Two types of transfer are supported:
- Cold Transfer – the call is transferred and the agent is disconnected immediately.
- 3 Way Transfer – Agent, Contact, and Transferee are put into a three-way call to introduce the Contact. The agent then hangs up leaving the contact and transferee connected.
Making Calls with the Webphone
The webphone is used to answer calls, navigate through IVR menus, mute, and put calls on hold.
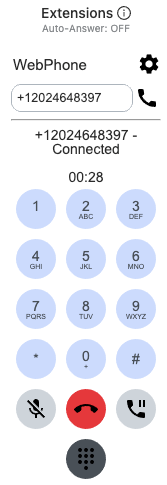
Administrators need to configure outbound calling for their agents, setting the callerID and gateway to use.
Numbers may be dialed international format. Agents are limited to one call at a time, and a limit has been put on the total number of calls allowed each day. All calls are automatically recorded and are available to the administrator.
In order for the WebRTC WebPhone to work, agents will need to allow their browser to access both their Microphone and Speakers:
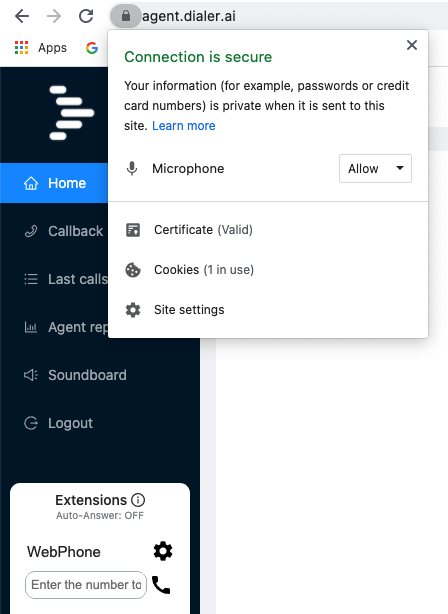
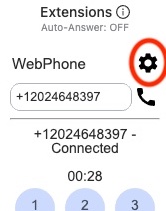
After setting these permissions, the agent can then configure which devices on their computer they wish to route the audio in-puts and out-puts too by clicking on the gear icon and selecting from the dropdown for each:
Please Note:
These options are only available if the agent is configured to use the WebRTC WebPhone routing method.
