Agent Management is very Simple within Flex CCC.
To Management Agent, From the Admin Interface click on CallCenter and select Agent from the Sub-Menu:

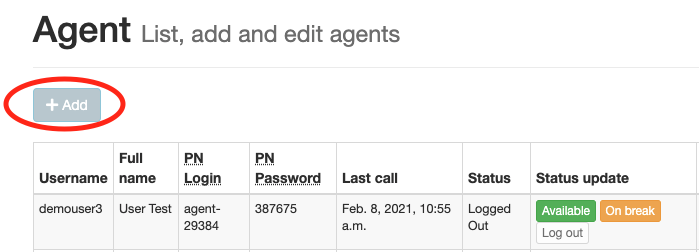
This will bring you to the Agent Management Screen.
Adding New Agents
To add a new agent, click on the add button.

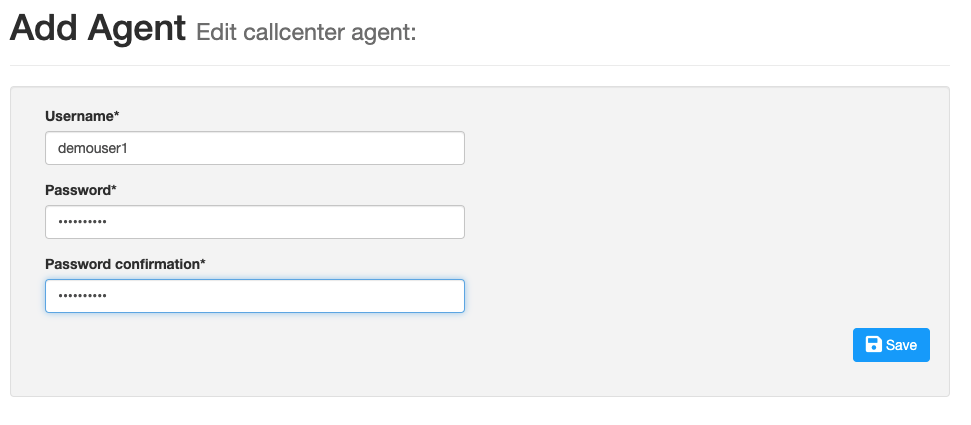
You will then be asked to enter a username and password for the agent.

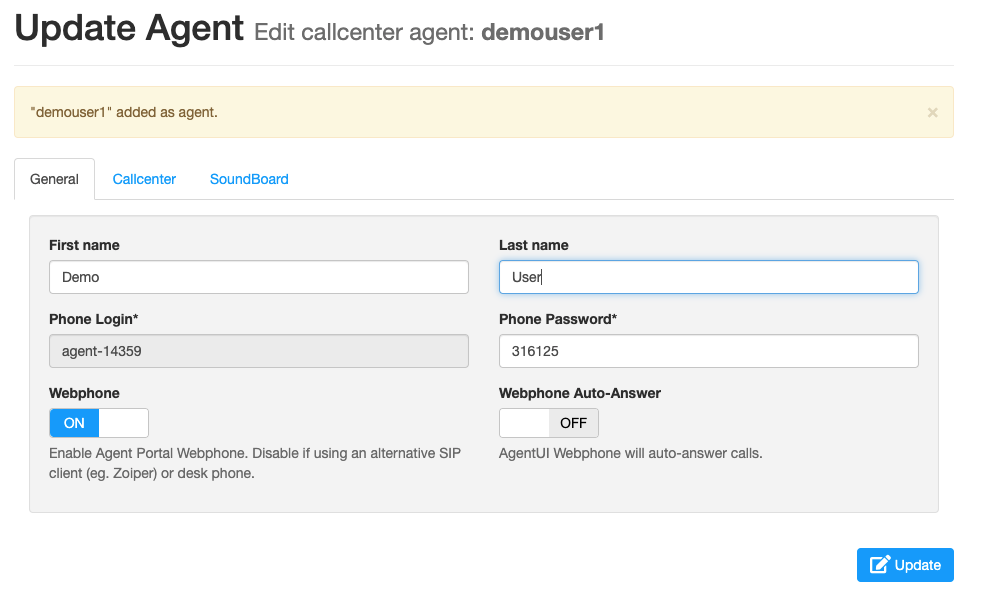
Next you will need to update the Agents Details and Configuration:

By default the WebRTC Webphone is enabled. You will note that it is suggested that you disable it if you are using an alternative routing method, such as a the Direct, or Standby Methods.
If you have the Webphone enabled, you can also select the Auto Answer feature which will automatically answer a call in the Agent Portal with out any interaction with the agent.
After you completed the General Configuration, select CallCenter to update the agent’s callcenter configuration:

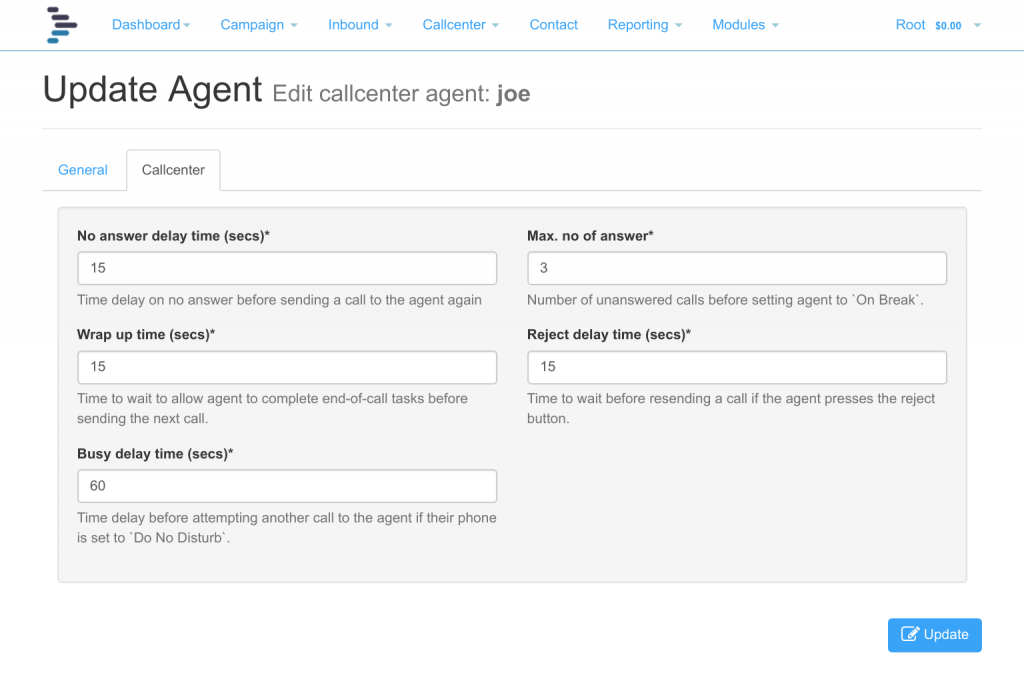
From here you can update and manage the agents inbound calling configuration:

There are 5 settings here you need to be aware of:
- No Answer Delay Time
This is the delay time in seconds the system will wait before attempting to retry a call to the agent in the event they do not answer. This setting only applies to agents that are using the WebRTC WebPhone, or the Routed Methods. - Wrap up Time
Number of seconds the system will wait before sending another call to the agent. This gives the agent time to complete any after call actions or processes before the next call comes in. - Busy Delay Time
This is the delay in seconds before the systems will attempt another call to the agent if their phone is set to Do No Disturb. This setting only applies to agents using the routed method. - Max No. of Answer
This is the number of calls that can go unanswered by the agent before the system automatically changes their state to “On Break”. This setting only applies to agents using the WebRTC WebPhone or the Routed Methods. - Reject Delay Time
This is the delay in seconds before the system will attempt to send another call to the agent if they press the reject button on their phone. This setting only applies to agents using the WebRTC WebPhone or the Routed Methods.
After you update the agents CallCenter Settings you then just need to press the Update button at the bottom of the screen, and the agent setup process is completed.
Updating Agent Settings
Updating an agents settings is very simple, to do so you need to simple click on the edit icon at the right of the agents listing on the agent management screen.

You will then be brought to the agent update screen where you are able to adjust the agents settings.

Deleting An Agent
To delete or remove an agent from the system, you can do so by click on the trash icon to the right of the agent you wish to delete.

