In some use cases, you may want the user’s outbound Caller ID to match that of their inbound Telephone Number. In this article, we will go through the step to set the Caller ID for a user.
Step 1 – Access the SmartPBX App
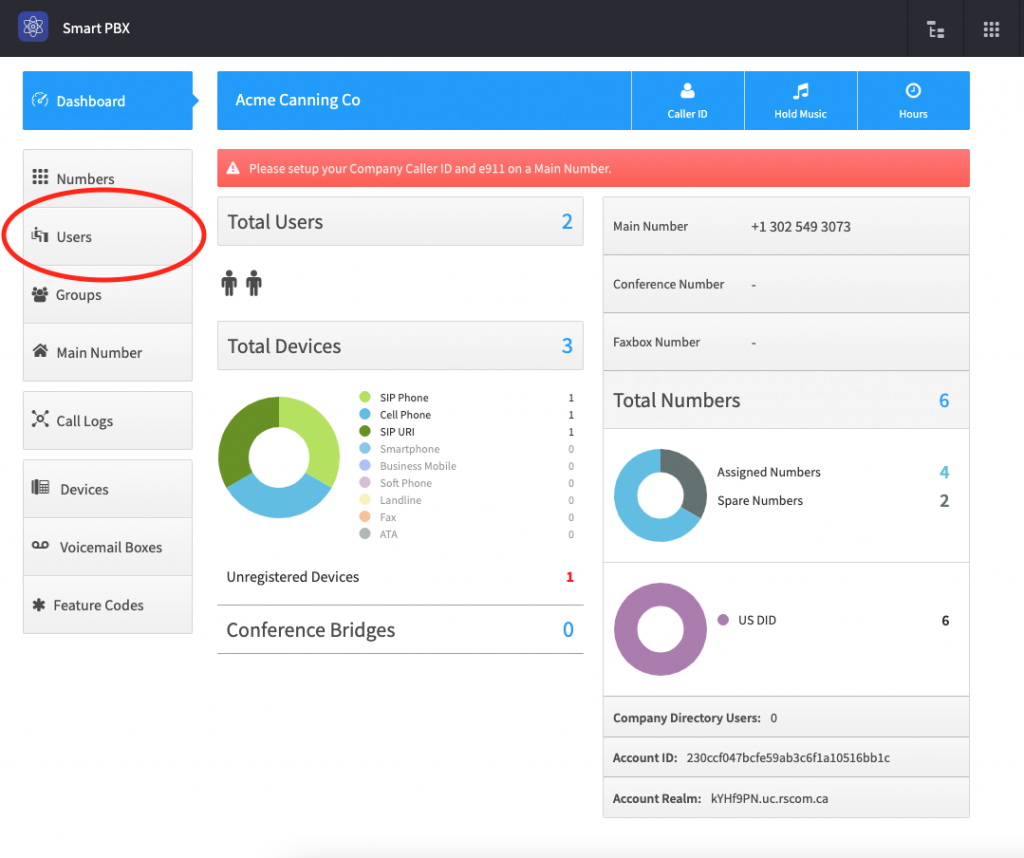
You will need to access the SmartPBX App and then navigate over to the user section:
Step 2 – Find the user you want to manage
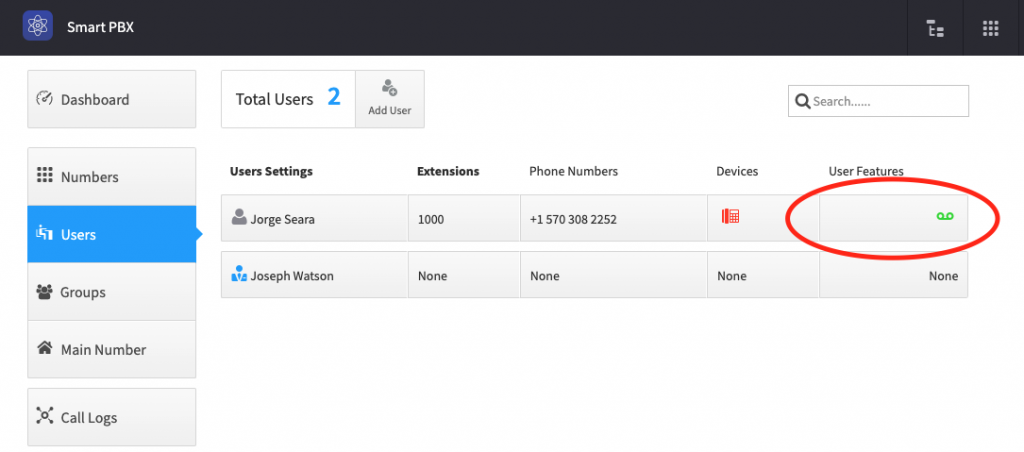
Next, you need to find the user you would like to manage, then open the features section for that user.
NOTE:
It is important that the user already have a Telephone Number Assigned to them. If they do not you will need assign a Telephone number to the user before you can continue beyond this point.
Step 3 – Selection of the Caller ID Feature
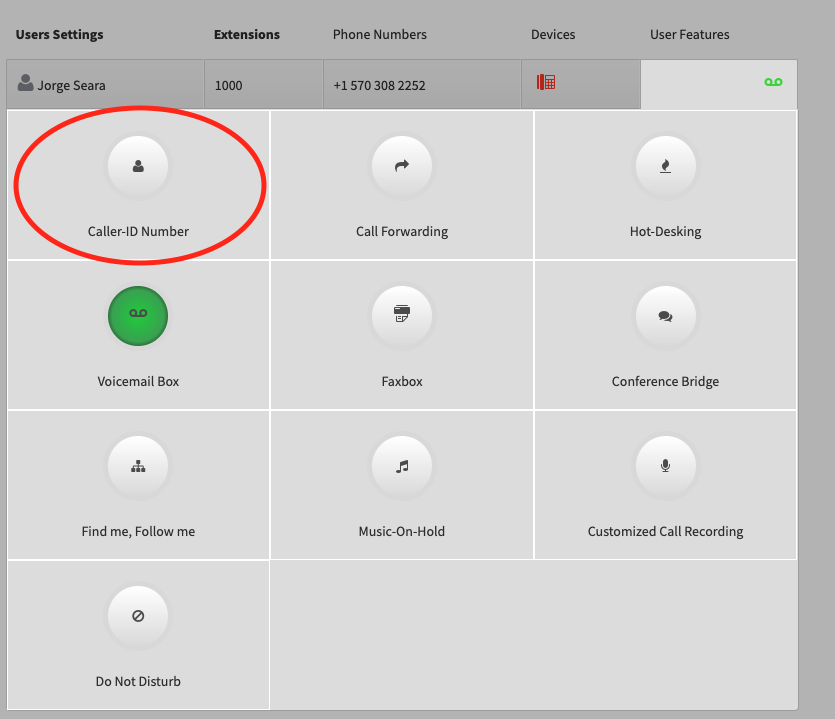
Now you should see the features that are enabled for the user. You now need to select the Caller ID Feature.
Step 4 – Enable the Caller-ID Number Feature
Now enable the feature
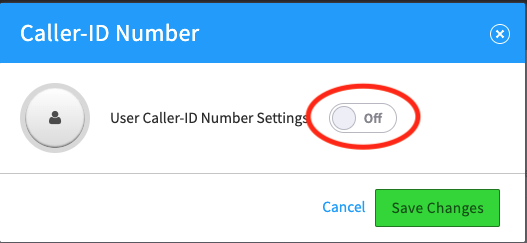
Finally make the selection of the number you want to use as the User’s outbound Caller ID, in the event the user had more than one telephone number assigned to them, you will be able to select which one you would like to set up as their Outbound Caller ID.
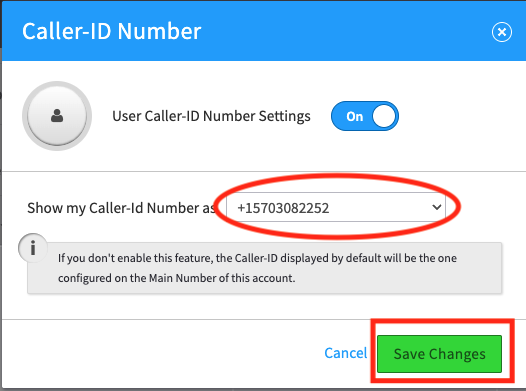
And then last, click on Save Changes.
