Messages can be setup to archive directly into your Azure tenant. This archive file can be imported into Sharepoint using a Azure Logic Apps provided below.
Instructions
Create Azure Resource
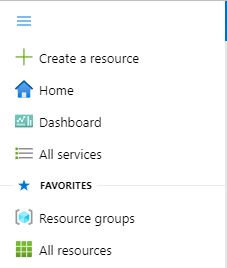
Firstly, create a resource in the Azure Portal by opening the navigation menu and selecting Create a resource.
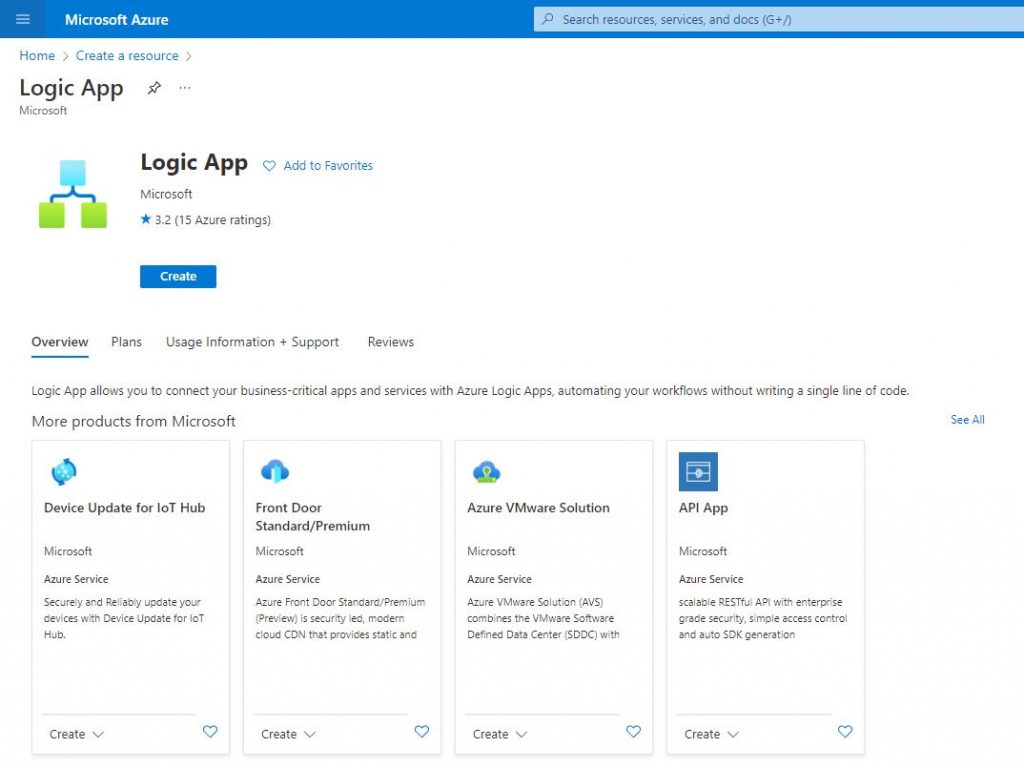
Enter “Logic App” into the search box and select Logic App from the search results. From the Create Logic App page, click on the Create button.
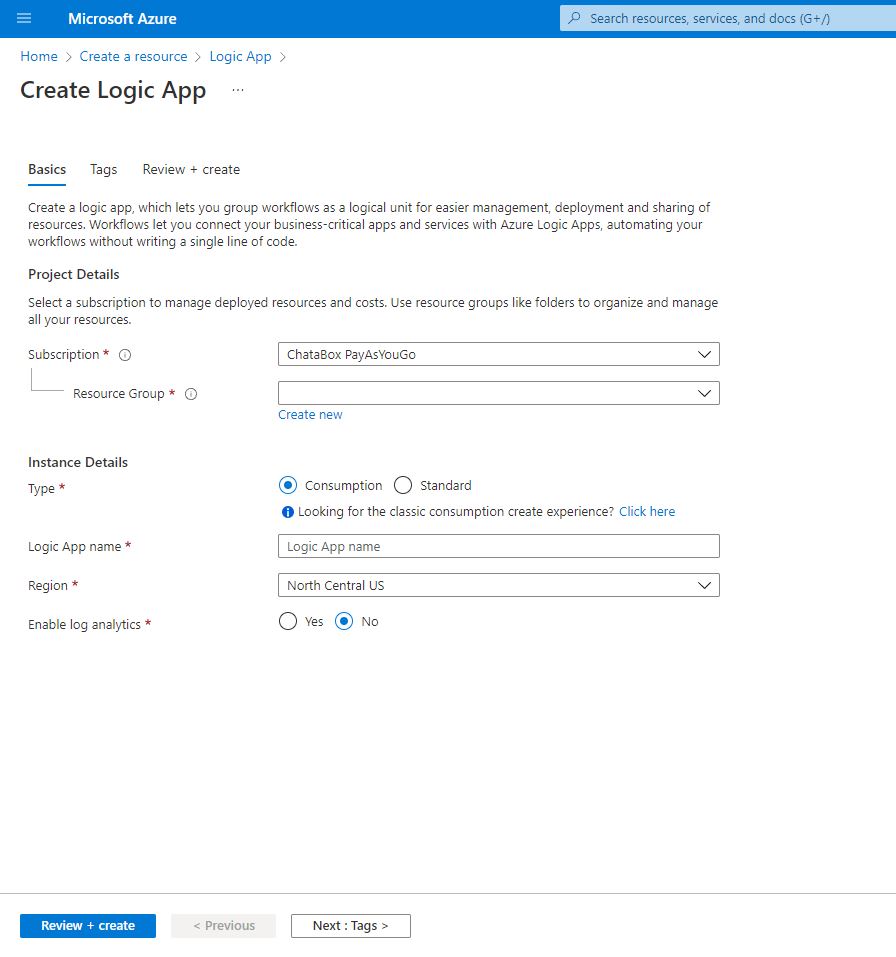
Select the Subscription and Resource Group where you ant the Logic App to be created. Select “Consumption” for the Type, enter the name of the Logic App and then click the Review + create button and then after reviewing, click on the Create button to complete the process.
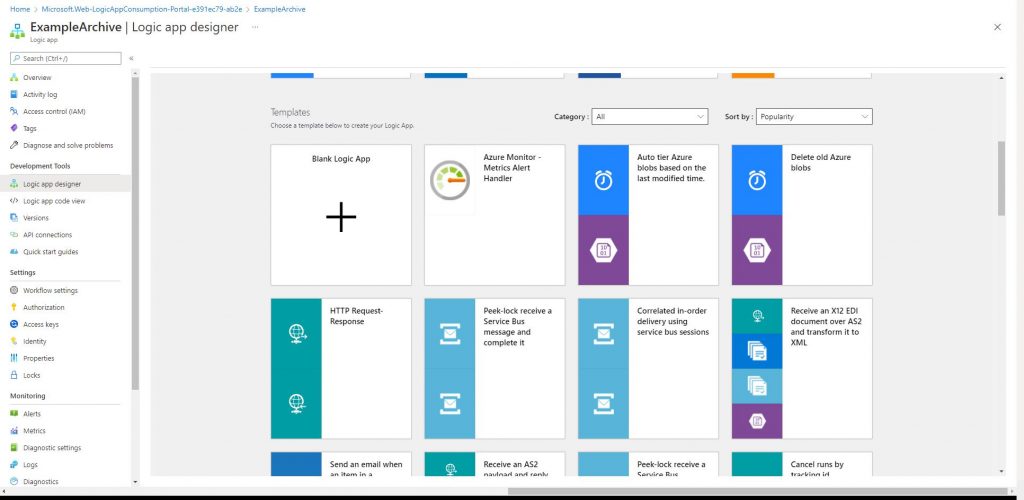
Click on the Go to resource button to navigate to the Logic Apps Designer page. Scroll down to the Templates section and select Blank Logic App.
This page will display the Designer view for creating a Logic App. Enter ‘Azure Storage’ into the Search connectors and triggers’ box and select ‘Azure Blob Storage’
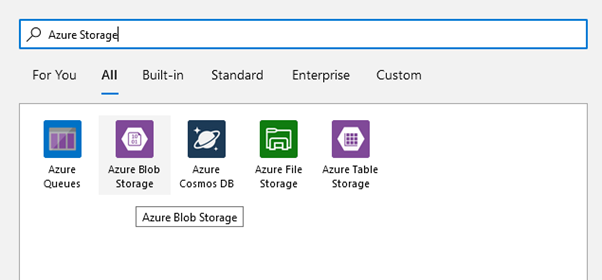
Select When a blob is added or modified (properties only) (V2) under Triggers

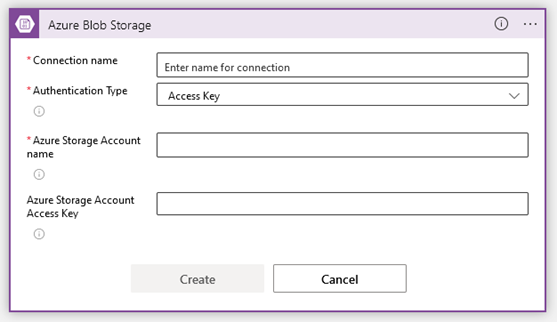
Enter the connection details for the Azure Storage Account that the archive files are being uploaded to and click on the Create button.
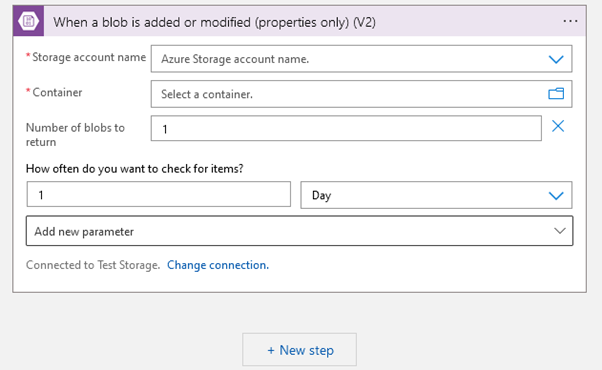
Select the Storage Account Name, click the folder icon to select a Container and change the Number of blobs to return to 1 and change the frequency to ‘1 Day’, then click on the + New Step button.
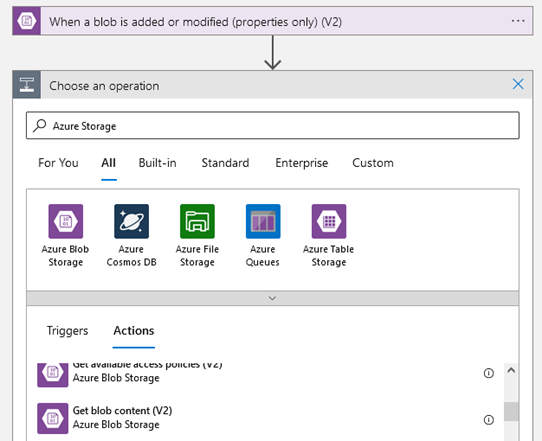
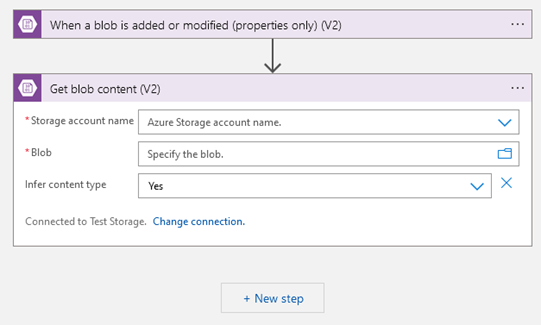
A new Choose an operation panel will appeaar underneath the Trigger. Enter ‘Azure Storage’ into the search box and in the Actions tab, select Get blob content (V2) Action.
Select the Storage account name and click on the Blob text box. This will display an Add dynamic content pop up window.
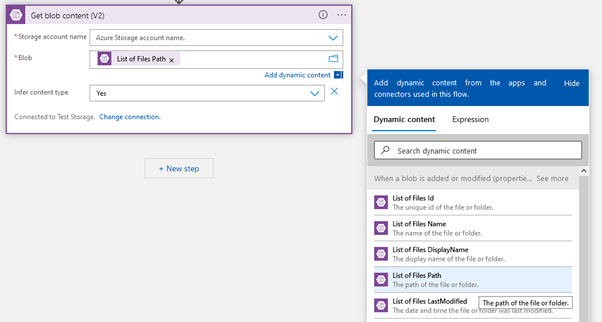
Select the List of Files Path option under When a blob is added or modified in the Add dynamic content popup. This will add a small box into the Blob text box and then click the + New Step button.
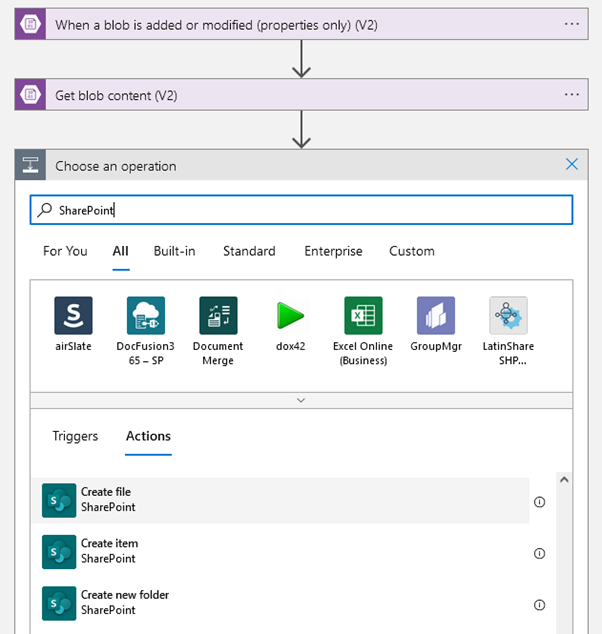
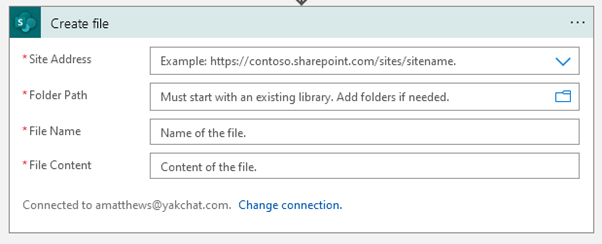
Enter ‘SharePoint’ into the search box and scroll down in Actions window and click on Create file for SharePoint.
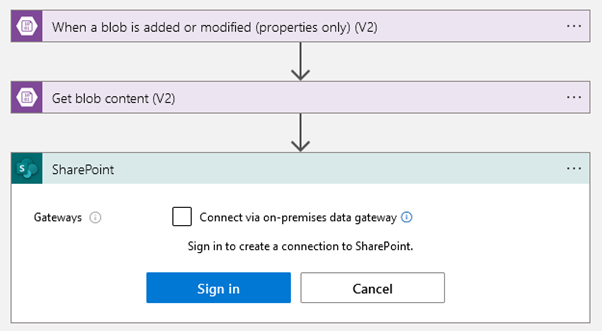
Click on the Sign in button and login using the Microsoft credentials for the SharePoint connection that will be the destination for the file.
Select the Site Address and click on the folder icon to select the Folder Path for where the file should be saved to.
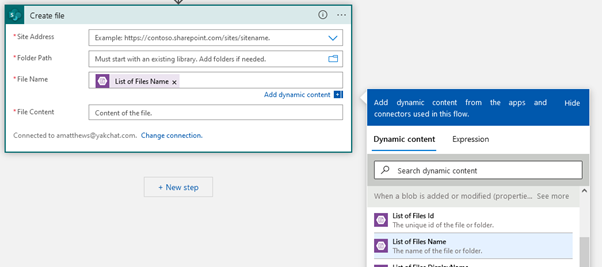
Click the File Name text box to bring up the Dynamic Content popup, and select the List of Files Name option under When a blob is added or modified
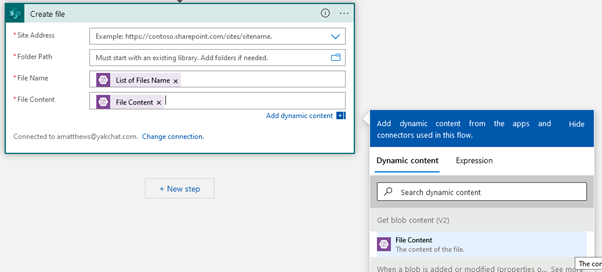
Click the File Content text box and select the File Content option under Get blob content (V2).
Finally, click Save at the top of the designer. The Logic App is now ready to automatically upload a file from Blob storage to a location in SharePoint.
